Google Slides is a robust presentation tool. It is free, connected to the cloud, and included with your Gmail account. If you don’t have a Gmail account, you can create one easily.
Start From Scratch Or Import Slides From a PowerPoint Presentation
Below are some tips on how to create a stunning Google Slides presentation and engage your audience:
Use a professionally designed template.Crop or mask images.Get creative with fonts.Image backgrounds.
You can also check out our previous post on how to convert a PowerPoint presentation to Google Slides.
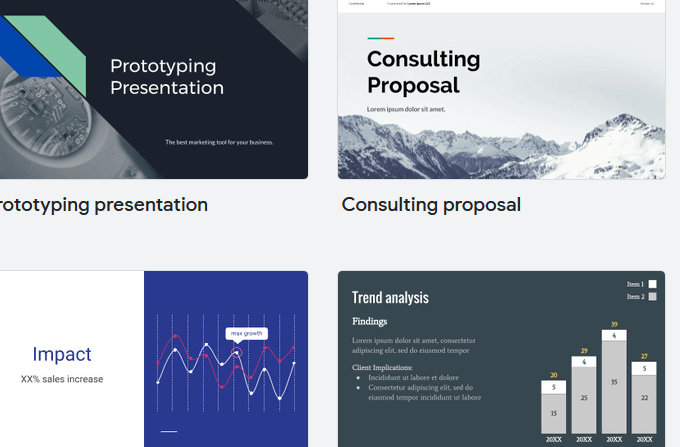
Use a Professionally Designed Template
Rather than starting from scratch, select one of Google Slide’s designs and customize it to meet your needs.
Sign into your Google account to get started. In the top right-hand corner of the screen next to your profile picture, click on Drive (under the grid icon).Select New at the top left-hand corner of the Google Drive dashboard, click Google Slides and select From a template to see the template gallery.Choose the template you like and click on it to open it in your drive.
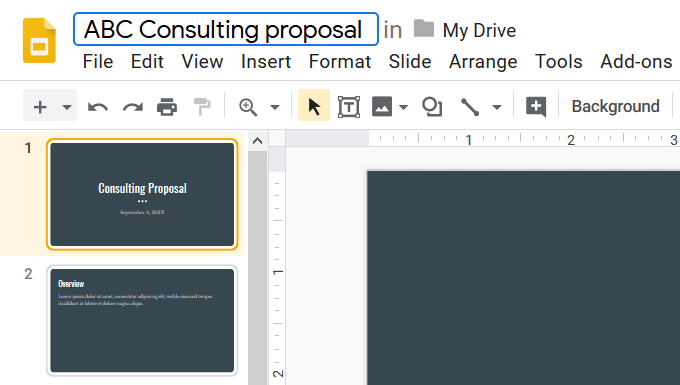
The first thing you want to do is rename the file by clicking on the title in the top left-hand corner and typing the name of your new project.
Change the theme at any time by pressing the Themes button on the top right-hand side of the navigation bar.Scroll through the available themes to change the layout and look and feel of your presentation.Click on the one you want to use. It will change everything in your presentation to match the theme.
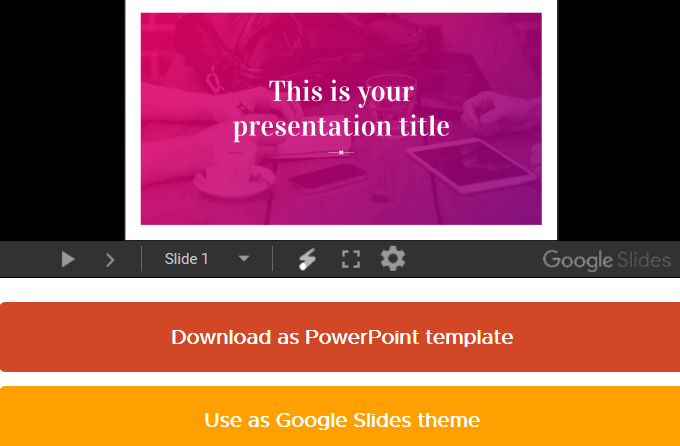
Below are a few screenshots of the title slide for the same presentation using different themes. Notice how changing the theme for the three slides above completely changes the design. For additional themes, visit Slides Carnival, a site that offers free professional designs that are completely customizable and easy-to-edit.
Search through the templates and select the one you want, click on it and select Use as Google Slide theme.
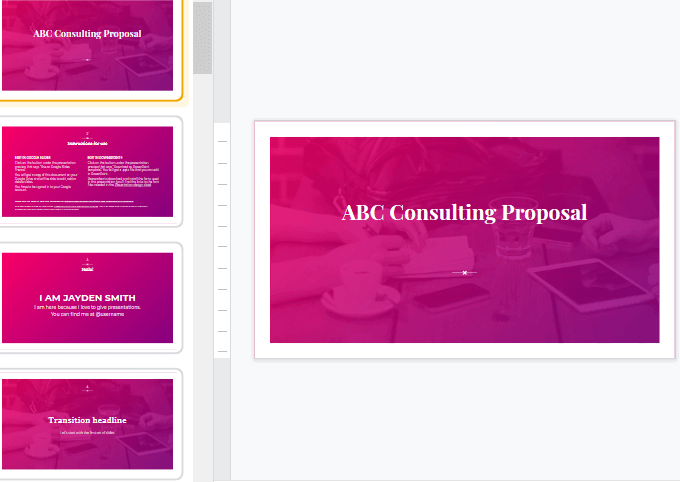
The theme will automatically open in Google Slides and include all the slides from the chosen template.
Edit the slides you want to use and delete those you don’t. Themes from Slides Carnival are free to share, copy, and edit with attribution. All they ask is that you provide a link back to their website. Taking advantage of designs created by professionals will enable you to create polished presentations to wow your audience.
Crop Or Mask Images
Once you have found a good source for high-quality images, or have produced your own, you can bring focus to relevant sections of an image or graphic by using the cropping tool. Trim the edges of an image, remove unwanted parts, or add a consistent design by cropping all your images into a shape (masking).
Select or upload an image to your slide. To insert an image, click on the Insert tab on the menu bar, hover over Image, and select Upload from computer.
Double-click on the image you want to use. To crop the image, double-click on it again and drag the black tabs to crop out the parts of the image you don’t want to use. Don’t click the blue tabs; they will resize your image.
To mask the image, highlight it and click on the arrow next to the Crop image tool. Select Shapes, then choose a mask shape and hit Enter to set the image to the shape of the mask.
Images cropped to shape can make your presentation more fun, creative and compelling.
Get Creative With Fonts
In addition to changing the font size, type, and color, you can use other creative ways to make your text stand out. You can also create your own fonts for importing into your project. Next, get creative and try adding a drop shadow to text can draw attention to it. Follow the steps below to create a drop text effect using two text boxes.
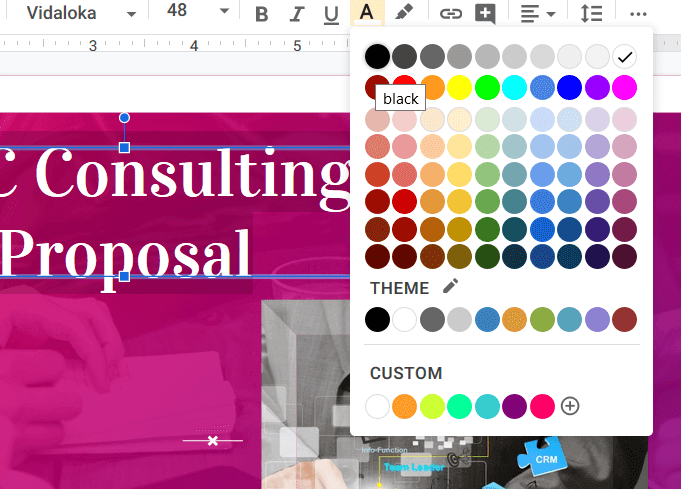
Highlight the text you want to add a drop shadow to and click the A icon from the top toolbar.This will open the color palette for you to choose a color. Select a dark color as this will become the shadow part of the effect.
Highlight and select the text again. Use the keyboard shortcut to copy it to your clipboard. For PCs, click CTRL + C. For Mac, use Command + C.Draw a new text box on the slide by clicking Insert from the top bar navigation and choosing Text box. Use CTRL + V (PC) or Command + V (Mac) to copy your text into the text box.Select the copied text by highlighting it. Click on the A icon in the toolbar to change the color of the text. A bright color works well.Drag the second text box over the first and position it slightly above or below and slightly to the side of the first text box.
Image Backgrounds
Google Slides backgrounds can be a color or an image. Images illustrate a point, draw in your audience, and are used as a symbol to represent a concept – often better than plain text. Use an image as a background to make your Google Slides presentations more visually appealing by:
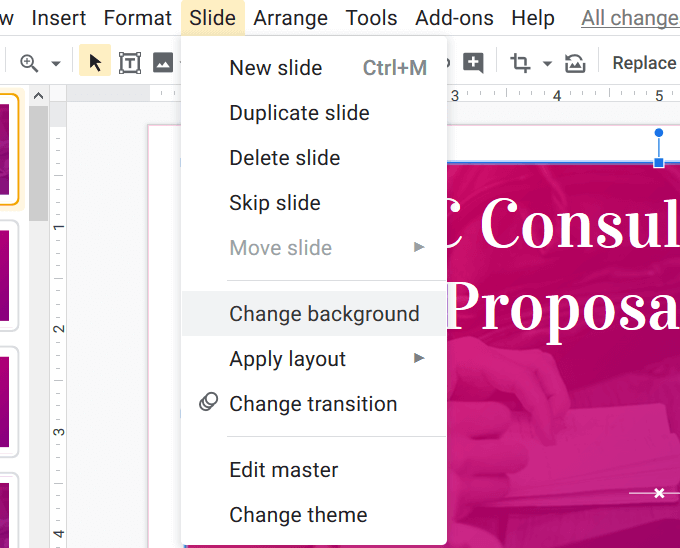
Opening the slideHovering over Slide and clicking on Change background
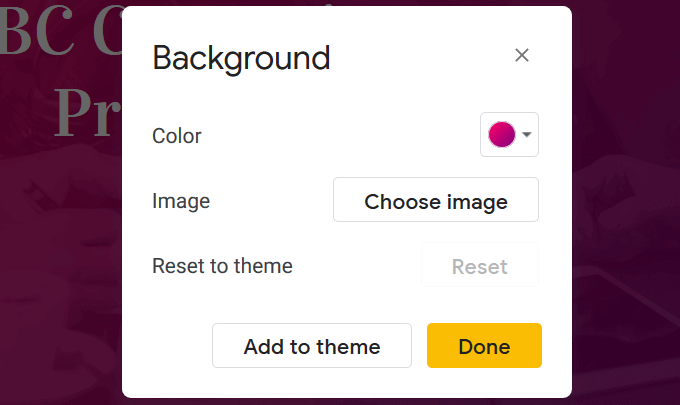
From the pop-up, click on Choose image.
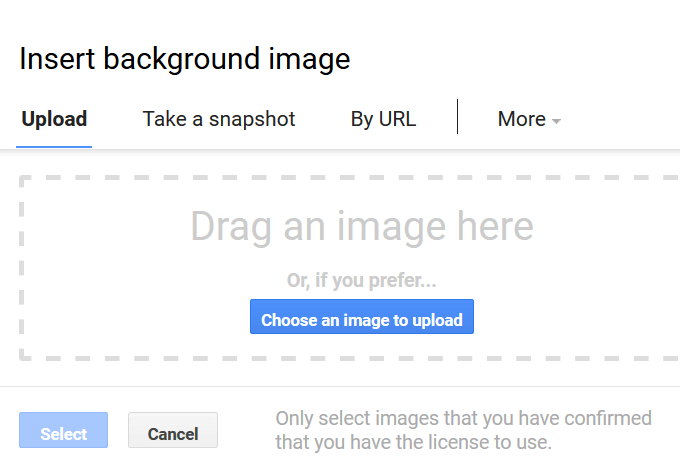
For this article, we will select the Upload option. Click on Choose an image to upload, double-click on the image you want to use, and then click Done.
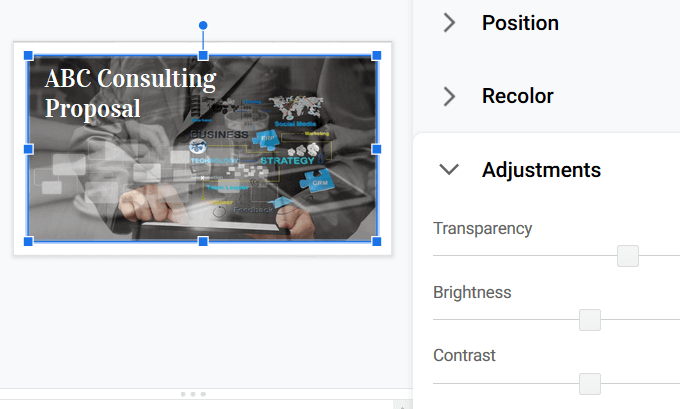
Important note: As you can see in the screenshot above, pay attention to image copyrights. Only use images that you have a license to use or those that are free to use or free with attribution required. You can run a reverse image search to find out more about any stock images you are using to make sure you are giving proper attribution. You might need to change the location and the color of your text to make it stand out from the background image. Background images can’t be resized or moved. However, they can be adjusted for transparency, brightness, and contrast. Click on the slide, not on an element. Select Format options. On the right-hand sidebar that opens, click Adjustments. Play around with these settings and the others seen in the image above to get the desired result. Presentations don’t have to be dull and boring. Use some of these tips to create stunning Google Slides that will hold the interest of your audience.