Using many monitors can increase your productivity. The time you waste switching through windows may not seem like much, but they add up. Running many applications is also far more convenient with more screens. In this article, we have provided a step-by-step guide on setting up multiple monitors on Windows 11.
Why Use Multiple Monitors on Windows 11?
How to Setup Monitors on Windows 11?
The process of setting up monitors in Windows 11 is very simple. You need to connect them physically and set up the screen display settings.
Better gaming experience.Convenient coding and debugging for programmers.Creating designs and simulations.Video conferences with many people.Productivity for office work and studies.
Check Compatibility, Graphics Card and Ports and Cables
The first step is to check if your computer supports multiple monitors. The compatibility depends on your OS and graphics card. Windows 11 does not have a limit on the number of external monitors. So, make sure to check the specifications of your graphics card. Most support adding another monitor, but they may not handle more than that. You can find the information on the manufacturer’s website. Another thing to check is the type of port on your PC and the monitors. The standard video ports are VGA, DVI, HDMI, DisplayPort, and Thunderbolt. Your laptop should have at least one of these ports on its sides or, very rarely, on its back. For desktop PCs, you’ll find them on the CPU, often directly connected to the GPU. For your monitors, check on their back or sometimes on their sides. Each type of port can only accept certain cables. But you can use adapters to connect between varying ports.
Connect Monitor to Windows 11
Now, you need to physically connect the Monitors to your PC. It doesn’t matter if the monitors are different or have different max resolutions. You can connect any monitor if your PC supports it. First, position your monitors according to your preference. Then move on to the sub-sections below depending on the number or type of monitors.
Add a Wired Monitor on Windows 11
Adding one external display to your system is quite simple. You only need to connect the device using the ports available. Different display connectors provide different options. So it’s better to check the built-in display ports before buying the PC or the monitors if you need to set up multiple monitors.
Thunderbolt connectors support ultra-fast video and audio transmission. You can also daisy-chain Thunderbolt displays if you have monitors that support them.DisplayPort connectors have higher bandwidth capacity for video and audio transmission. So it’s almost always the best option. You can also daisy-chain monitors that have DisplayPorts.HDMI and VGA cables also support video and audio transmission, but they are inferior to DisplayPorts. Still, unlike VGA, HDMI is a digital connector. So, it’s always going to be better than VGA. In fact, most modern computers don’t have VGA ports.DVI cables do not support audio or 4k video transmission. But it’s a good choice to get high refresh rates on a 1080p monitor.
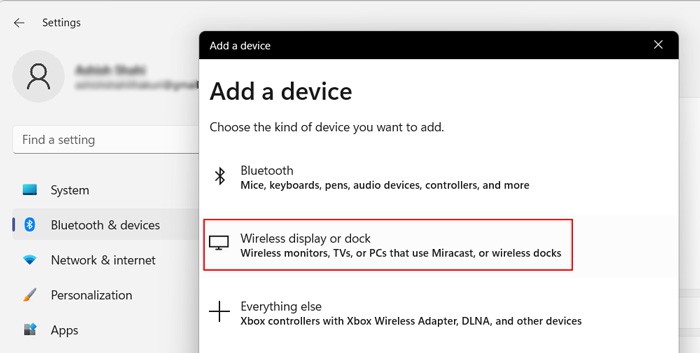
Add Wireless Monitor on Windows 11
Adding a wireless monitor is easier as you don’t have to worry about the cables and ports. To add such a monitor to Windows 11,
Add Two or More Monitors on Windows 11
Increasing the number of monitors to two makes adding them a much more complex process. Most PCs only have a single port for display output. So, you need to use one of the following methods to add more than one screen:
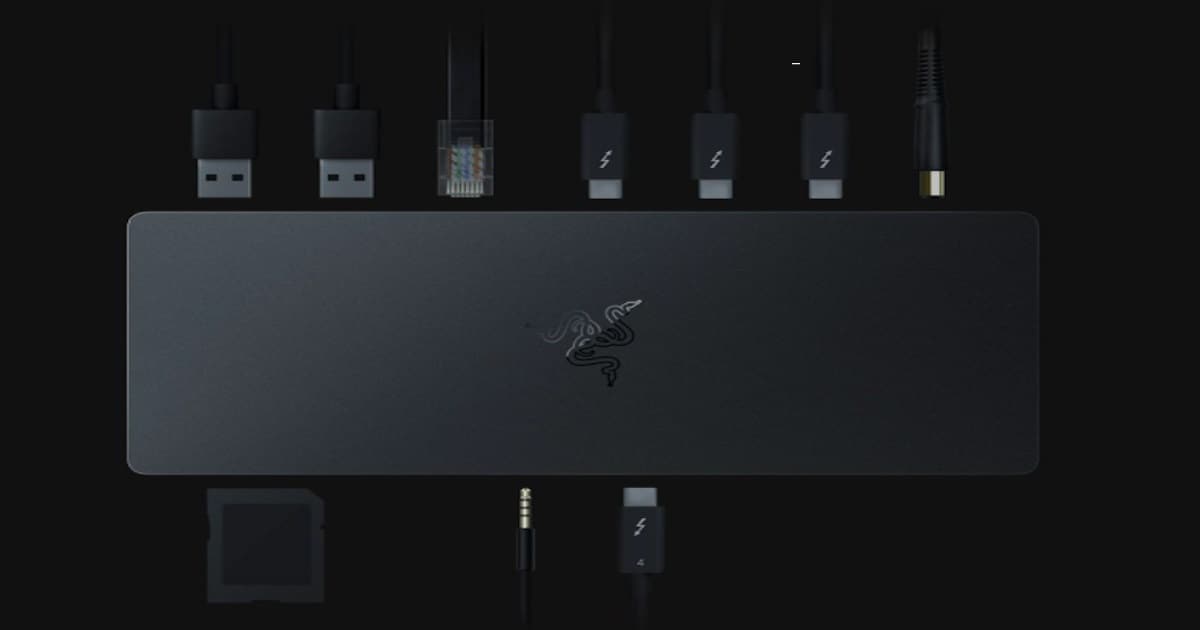
If you have DisplayPort or Thunderbolt-compatible devices, you can create a daisy chain of the monitors.You can also use multi-head display splitters or docking stations to connect many monitors. Docking stations are the more powerful options. And many older splitters only allow mirroring the same display.USB Adapters also allow connecting the monitors to the USB cables. But the transmission is slow, so it’s not suitable for gaming.
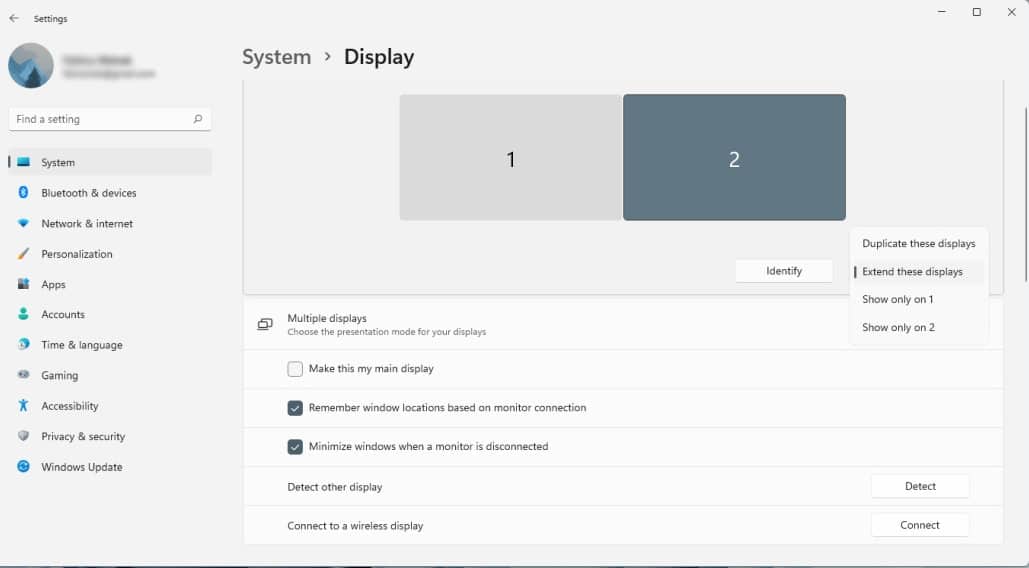
Setup Multiple Monitors on Windows 11
The next step is to set up the monitors on your system. Make sure to power up your laptop, monitors, and adapters or docks after connecting them, and follow the instructions below: You can also change the view mode from the layout portion. Click on the drop-down box on the right and pick from the options. In general,
Duplicate: Mirrors the same display on the screens.Extend: Extends the primary display across all screens.
You can also quickly change the view mode from the Project Display (Win + P).
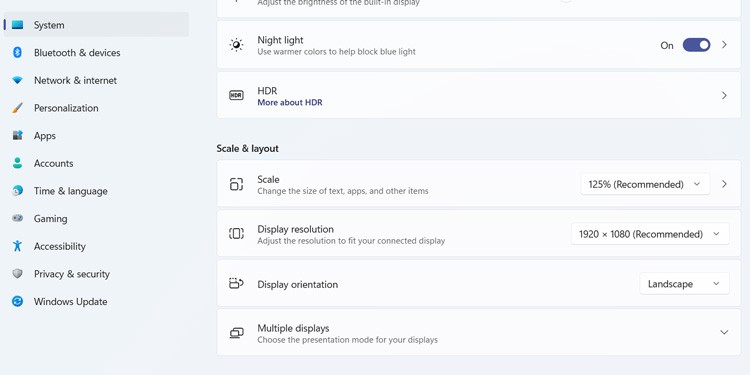
Customize Multiple Monitor Settings
You can customize different display settings for separate monitors. To do so, select a screen from the Display settings layout and set the following display settings.
Scale: It changes the size of the icons and the texts. You can select from the drop-down list or click on Scale and enter a value for the Custom scaling option. Don’t forget to click the Tick button if you set a custom option.Resolution: Sets the resolution for the screen. Keep in mind that very high resolution for all monitors is very taxing on your GPU.Orientation: Changes the orientation of the display. We don’t recommend changing it to anything except Landscape for the main screen.Night Light: Enabling it gives low-intensity light for the display during night hours. Click Night light to set the light intensity and the night hours. This setting applies to all connected monitors.HDR: It allows a more vibrant display for some apps on PCs that support HDR. It also applies to all screens.
You can also customize advanced settings such as refresh rate, color profile, etc., from the Advanced display settings.
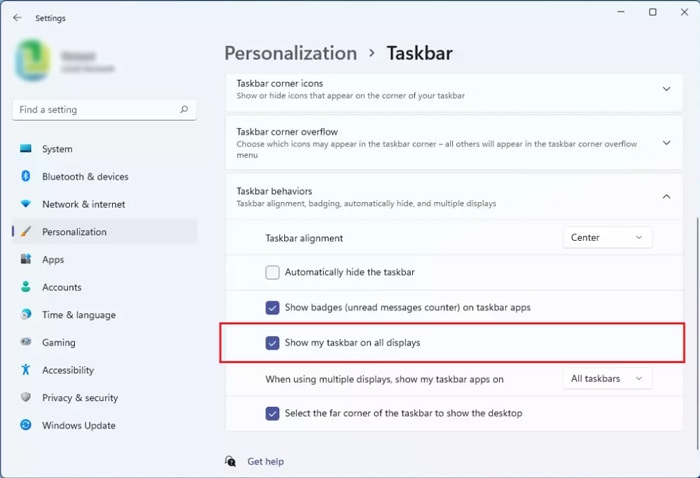
Set Background and Taskbar Settings
It is also possible to set different backgrounds for each screen. Here’s how you can do so: You can also choose Slideshow for the Personalize your background option. It displays different backgrounds as slideshows for the monitors. It is also possible to choose whether you want the Taskbar on all monitors or only the primary one. To do so,
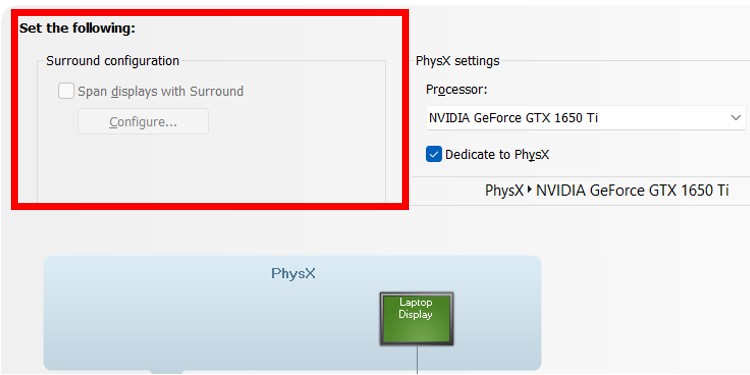
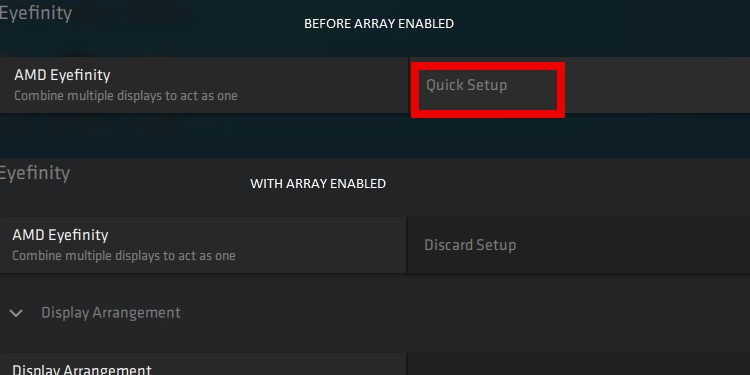
Setup GPU Settings for Multiple Monitors
If you want to set up multiple monitors for gaming, you need to enable multiple screen displays on your GPU settings as well. Here are the necessary steps depending on your GPU: NVIDIA AMD
Related Questions
How to Fix External Display Not Working on Windows 11?
If the external display is not working, it’s likely because of connection or driver issues. Make sure to reconnect the monitors to your PC while giving special attention. Then, update your graphics and monitor drivers. You can also visit our articles on Windows not detecting second monitor or third monitor to troubleshoot this issue.